

Hot Water Heater Leaking: Common Causes and How to Fix It
Your hot water heater leaking is nothing to “keep an eye on.” It’s not a small inconvenience. It’s not “just a drip.” It’s your money, time, and possibly your entire bathroom floor slipping away one slow, taunting drop at a time.
The problem is, most people won’t do anything until it’s too late. There’s actually a name for this—normalcy bias—that little voice in your head that says, “Meh, it’s fine.” But it’s not. That “small leak” could quietly burn through 9,000 gallons of water a year—and that’s before the mold creeps up, the drywall warps, and your bank account takes a hit.
So, what’s it going to be?
A quick fix today, or a rental dehumidifier and a five-figure repair bill later?
If you’re seeing puddles, damp spots, or that unmistakable musty smell, this is your heads-up: your water heater is planning something. Let’s deal with it before you need a raft.
Common Causes of a Leaking Hot Water Heater

So, your water heater is leaking water, and you're wondering why. Here are the usual suspects behind this wet mess.
1. Aging Water Heater Tank
Water heaters aren't immortal. As they age, typically beyond 8-12 years, the internal components deteriorate, leading to potential leaks. Corrosion and sediment buildup weaken the tank, making it susceptible to leaks.
What to Do: Regular maintenance can extend the lifespan, but if your unit is approaching its golden years and starts leaking, it's time to consider a replacement.
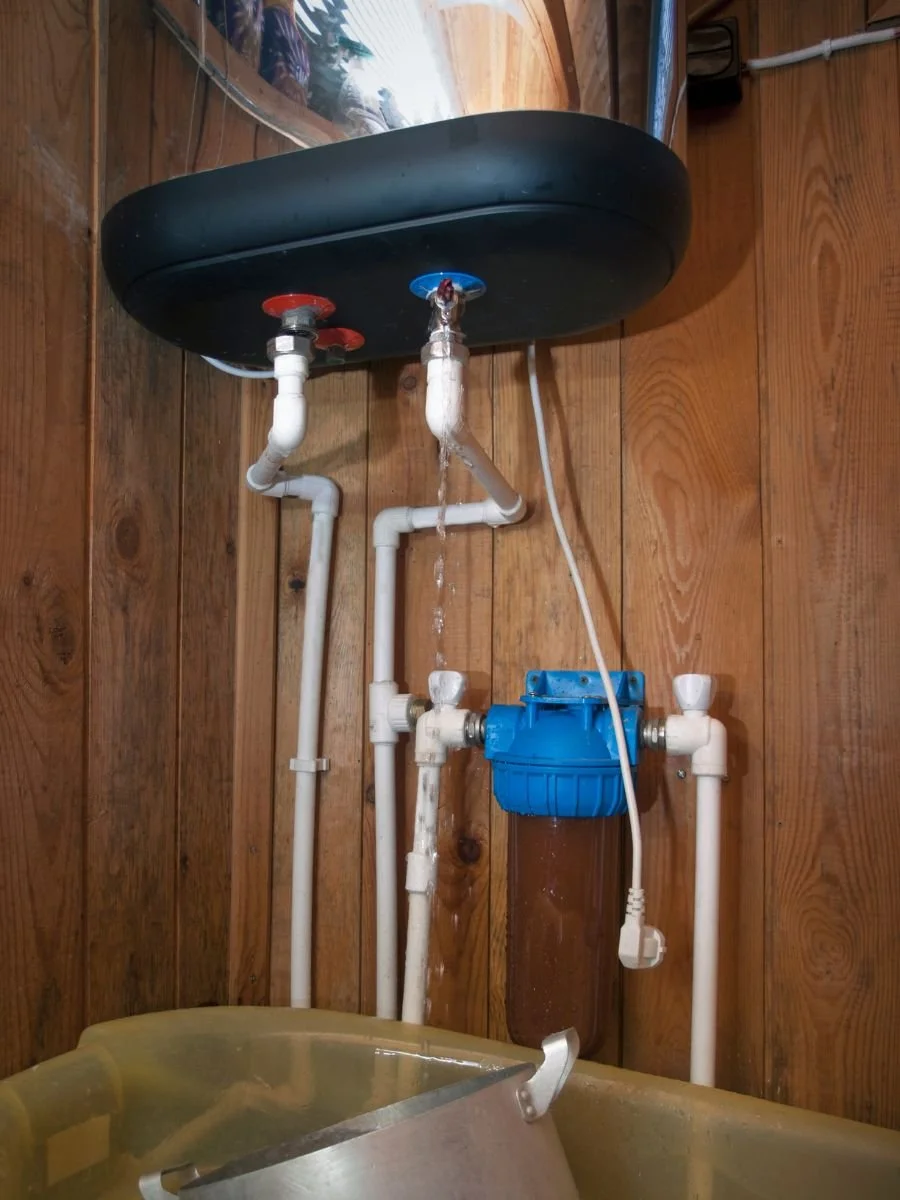
2. Loose or Faulty Drain Valve
The drain valve at the bottom of your heater is designed for maintenance, allowing you to empty the tank. Over time, this valve can become loose or wear out, leading to leaks.
What to Do: Check if the valve is securely closed. If tightening doesn't stop the leak, the valve may need replacement.
3. Excessive Pressure
Your water heater maintains pressure to supply hot water efficiently. However, if the pressure exceeds safe levels, it can cause leaks or even damage the tank.
What to Do: Ensure your home's water pressure is within the recommended range. Installing a pressure-reducing valve can help maintain safe levels.
4. Malfunctioning Temperature and Pressure Relief (T&P) Valve
The T&P valve is a safety feature that releases excess pressure from the tank. If it's faulty or improperly installed, it can leak.
What to Do: Regularly test the T&P valve by lifting its lever and allowing it to snap back. If water continues to flow or drips afterward, the valve may need replacement.
5. Corroded Anode Rod
The anode rod attracts corrosive elements in the water, protecting the tank from rust. Over time, this rod deteriorates, and once it's fully corroded, the tank itself begins to rust, leading to leaks.
What to Do: Inspect the anode rod annually and replace it if it's heavily corroded. This simple maintenance can significantly extend your water heater's lifespan.
6. Sediment Buildup
Over time, minerals from hard water settle at the bottom of the tank, forming sediment. This buildup can cause the tank to overheat, leading to deterioration and leaks.
What to Do: Regularly flush your water heater to remove sediment and maintain efficiency. This practice can prevent many common issues associated with leaks.
How to Diagnose a Leaking Hot Water Heater
Identifying the source of a leak is crucial for effective water heater repair. Here's a step-by-step guide to help you pinpoint the problem.
1. Turn Off the Power Supply
Safety First: Before inspecting, ensure the power supply is off. For electric heaters, switch off the circuit breaker. For gas heaters, set the thermostat to the "off" position.
2. Shut Off the Water Supply
Prevent Further Leakage: Locate the cold water shut-off valve above the heater and turn it off to stop water flow into the tank.
3. Examine the Top of the Tank
Potential Issues: Leaks at the top may stem from inlet/outlet connections or the T&P valve.
What to Look For: Check for pooling water around these components. Loose connections can often be tightened to resolve minor leaks.
4. Inspect the Bottom of the Tank
Potential Issues: Leaks at the bottom can result from a faulty drain valve or internal tank problems.
What to Look For: Observe for water pooling around the base. A leaking drain valve might need tightening or replacement. If the tank itself is leaking due to corrosion, replacement is often necessary.
5. Check the T&P Valve
Potential Issues: A malfunctioning T&P valve can cause leaks, especially if it's releasing water due to excessive pressure.
What to Look For: Lift the valve's lever to test it. If it doesn't release water or continues to leak after testing, it may be defective.
6. Look for Signs of Corrosion or Rust
Potential Issues: Rust-colored water or visible corrosion on the tank indicates internal deterioration.
What to Look For: Discolored water from your taps or rust spots on the tank's exterior are red flags.
7. Listen for Unusual Noises
Potential Issues: Sounds like popping or rumbling can indicate sediment buildup, which can lead to leaks.
What to Do: Flushing the tank can remove sediment and may resolve the issue.
8. Consult a Reputable Plumbing Company
When to Call the Pros: If you're unable to identify or fix the leak, it's time to seek professional help.
Why: Experienced plumbers can accurately diagnose and perform necessary water heater repairs, ensuring safety and efficiency.
By understanding what causes a hot water heater to leak and how to diagnose it, you can take proactive steps to address the issue. Regular maintenance and prompt attention to leaks will help extend the life of your water heater and prevent costly damage.
How to Fix a Leaking Hot Water Heater
So, your hot water heater is leaking, and you're contemplating whether to don the DIY cape or call in the pros.
Let's break down the steps to address this issue, ensuring you make informed decisions without unnecessary stress.
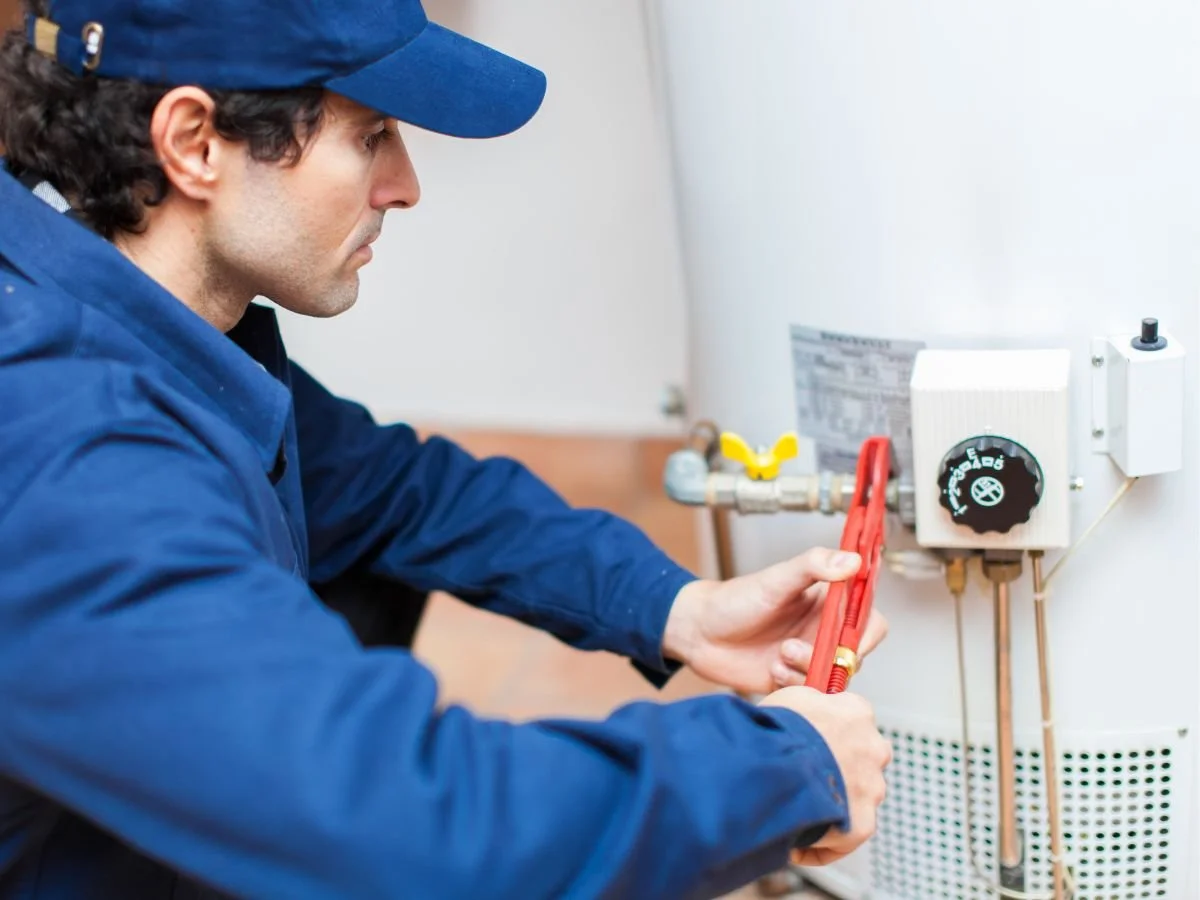
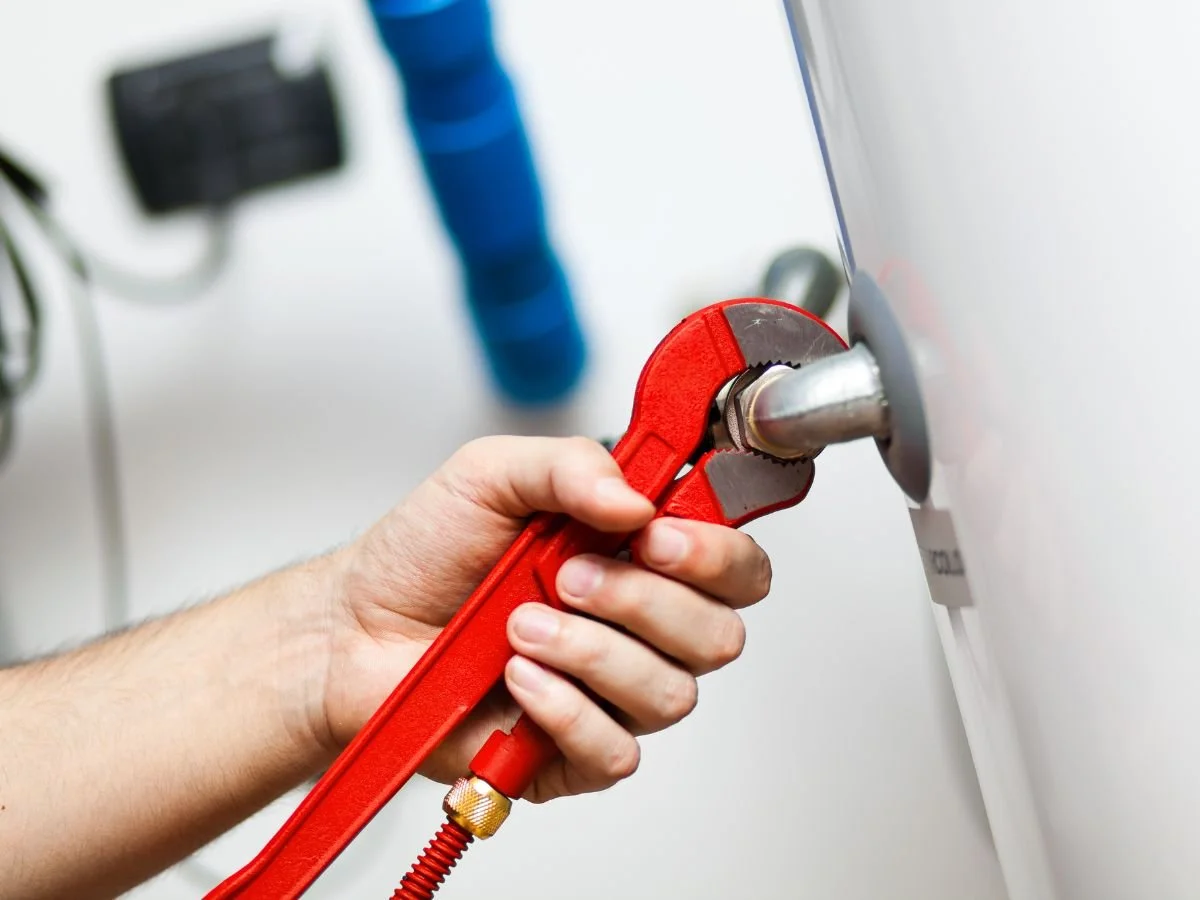
1. Tightening Connections
Leaks often originate from loose connections at the top of the heater, where the cold water enters and hot water exits.
Steps to Take:
Power Down: Before anything else, ensure the heater is off. For electric units, switch off the circuit breaker. For gas heaters, set the thermostat to "pilot" mode.
Inspect Connections: Use a wrench to gently tighten the inlet and outlet connections. Avoid over-tightening, which can cause damage.
Restore Power: Once adjustments are made, turn the heater back on and monitor for leaks.
Note: If tightening doesn't resolve the issue, the problem might be more complex, necessitating professional intervention.
2. Replacing Faulty Valves
A. Temperature and Pressure Relief (T&P) Valve
The T&P valve is a built-in safety mechanism that prevents your water heater from turning into a pressure bomb. When it fails, it either leaks constantly or—worse—does nothing at all when pressure spikes. If your water heater is leaking from the top near this valve, it's likely malfunctioning.
Steps to Take:
Turn Off Power & Water: Cut the power to your heater and shut off the cold water supply valve.
Drain a Few Gallons: Open the drain valve near the bottom of the tank to relieve pressure.
Replace the Valve: Use a wrench to unscrew the faulty T&P valve and install a new one.
Test for Leaks: Turn the water and power back on, checking for any drips.
If this valve keeps leaking even after replacement, your heater may have excessive pressure issues that need professional assessment.
B. Drain Valve Replacement
The drain valve at the base of your heater is supposed to release water when you flush the tank. But if it’s cracked, corroded, or improperly sealed, it starts leaking. If you’ve noticed your hot water heater leaking from the bottom, this is a prime suspect.
Steps to Take:
Shut Off Water & Power: No shortcuts—water and electricity/gas don’t mix.
Drain the Tank: Attach a hose to the drain valve and let the water flow out.
Remove & Replace: Use pliers to unscrew the old valve, then screw in a new one (use plumber’s tape for a tight seal).
Refill & Monitor: Turn the water supply back on and check for leaks.
If water is pooling under the tank even after valve replacement, the internal lining might be cracked, meaning your heater is on borrowed time.
3. Flushing the Tank
Over time, minerals and sediment settle at the bottom of your tank. This buildup causes overheating, strange rumbling noises, and can eventually corrode the bottom of the tank, leading to leaks. If your water heater is leaking from the bottom, this could be why.
Steps to Take:
Turn Off the Heater & Water Supply (safety first).
Attach a Hose to the Drain Valve and direct it outside or into a bucket.
Open the Valve & Let the Water Flow until it runs clear.
Turn Water Supply Back On & Close the Valve.
If sediment buildup has already damaged your tank, flushing won’t fix the leak. You may need a full water heater replacement.
4. When to Replace Your Water Heater
Not all leaks are fixable. Here’s when it’s time to cut your losses and get a new heater:
✅ Your heater is 10+ years old. Most last 8-12 years. If yours is past its prime and leaking, it’s time.
✅ There’s visible rust or corrosion on the tank. Rust never sleeps. If it’s on the outside, it’s worse on the inside.
✅ Leaks persist even after valve replacements. If you’ve swapped out faulty components but water keeps showing up, the tank itself is likely compromised.
✅ Water damage is getting out of hand. If your heater is turning your utility room into a shallow pond, don’t wait for mold and structural damage.
If you need a water heater replacement, reach out to a reputable plumbing company to ensure a proper, warranty-backed installation.
Preventative Maintenance Tips
Water heaters don’t demand much, but ignoring maintenance guarantees an early death—for your heater, your savings, and possibly your sanity. These simple steps can keep leaks (and disasters) at bay.
1. Inspect Your Heater Monthly
A five-minute check can save you thousands in water damage. Look for:
Moisture around the base or on top
Signs of corrosion
Leaking valves or fittings
Run your hand along the pipes to check for dampness. A slight drip today could be a flooded basement next week.
2. Flush the Tank Every 6-12 Months
Even if you don’t see problems now, sediment is accumulating at the bottom. Flushing your tank removes buildup before it causes overheating, leaks, or complete failure.
3. Check the Anode Rod Annually
The anode rod attracts corrosive minerals to protect the tank’s interior. When it wears out, your tank becomes the next target.
If the rod is less than ½ an inch thick, replace it.
If you don’t, your heater will start corroding from the inside out.
4. Test the Pressure Relief Valve Twice a Year
This tiny component prevents your water heater from exploding. No exaggeration.
Lift the valve’s lever and release it.
If it doesn’t release water, it’s stuck.
If it drips constantly, it’s faulty.
In both cases, replace it immediately.
5. Control Water Pressure
Excessive pressure stresses your heater’s internal lining and joints, leading to leaks.
Test your home’s water pressure—it should be between 40-60 psi.
Install a pressure-reducing valve if needed to prevent long-term damage.
Conclusion
Water heaters aren’t built to last forever, but most leaks are preventable with proper maintenance. Whether your hot water heater is leaking from the bottom, from the top, or somewhere in between, addressing the problem early saves time, money, and potential home damage.
If your leak is small, tightening a valve or flushing the tank might be enough. But if your heater is rusting, corroding, or over a decade old, it’s time for a replacement.
If you’ve noticed any leaks, get ahead of the issue before it turns into a full-blown disaster. For expert advice, repairs, or a water heater replacement, contact a reputable plumbing company before your water heater decides to flood your home on its own terms.
Frequently Asked Questions
-
A leaking water heater is a warning sign, not a minor inconvenience. Continuing to use it can lead to escalating damage, from water waste to electrical hazards and even complete failure. If the leak is from a valve, a repair might be possible, but if it's from the tank, continued use will only worsen the situation. Shut it off and address the problem immediately to prevent costly damage or safety risks.
-
Once a water heater starts leaking from the tank itself, its days are numbered. Minor leaks from valves or connections can sometimes be repaired, but an internal tank leak is a sign of irreversible corrosion. In such cases, failure is inevitable—often within days or weeks. Ignoring it could lead to a catastrophic rupture, so replacement should be scheduled as soon as possible to avoid potential flooding and water damage.
-
A leaking water heater can quickly escalate into an emergency. Even a slow drip can cause mold growth, structural damage, and increased utility bills. If the leak is from the pressure relief valve or the tank itself, the risk of overheating, pressure buildup, or a complete tank failure increases. The safest course of action is to shut off the water and power supply and contact a professional immediately.
READ MORE…
Tankless Water Heater Repair: Why Your 'Forever Hot Water' Promise Might Be a Pipe Dream
When to Replace Your Water Heater: Signs, Timelines, and Considerations
Top 10 Reasons for Low Water Pressure in Your Home