

Faucet Repair 101: How to Fix Common Leaks and Drips
You don’t need a plumbing degree to know that faucet repair is one of those things everyone puts off until the sink sounds like it’s throwing a tantrum. But here’s the inconvenient truth: that soft, rhythmic drip is not harmless. It’s not cute. And it’s absolutely not “just water.” It’s a sign your faucet’s turning on you—slowly, silently, and expensively.
We’ve seen it a thousand times. The late-night plink… plink… plink that burrows into your brain. The slow creep of your water bill climbing higher than your standards in dating. And let’s not even start on the internal damage—because yes, it’s already begun.
Here’s the part no one tells you: one leaky faucet can waste up to 3,000 gallons a year. That’s your money dripping away—while your faucet sits there like it’s done nothing wrong.
Understanding Common Faucet Problems

You know what’s wild? People will ignore a drippy faucet until the sink looks like it’s melting into the cabinet—and even then, some will still just “tighten it harder.” Not judging. But if you've been muttering at your tap like it’s misbehaving on purpose, you’re not alone.
The truth is, every type of faucet leak is your system’s way of politely (or passive-aggressively) warning you that something small has gone sideways—and might be dragging bigger problems behind it.
Let’s break this down before your “just a drip” turns into “wish I’d fixed that last year.”
Types of Leaks (and What’s Actually Causing Them)
The ‘Death by Drip’ Classic
Constant drip from the spout? That’s probably a worn washer or a beat-up valve seat. Over time, even a tiny gap in the seal gives water the green light to escape. Don’t just sit there googling how to “fix leaky faucet” while letting it soundtrack your life—this one’s easy to deal with, if you catch it early.
The Drenched-Base Mystery
If water keeps pooling around the base, your O-ring’s probably checked out early. It’s meant to seal the handle to the faucet body. When it breaks down, it leaks under pressure—and you get mystery puddles and that subtle "Why does under here always smell damp?" vibe. A classic case of a simple dripping faucet repair opportunity getting overlooked.
The Moody Flow Shuffle
If your faucet’s going from firehose to dribble to spit-take mode, it’s not being moody. You’ve likely got mineral buildup clogging the aerator, or the cartridge inside is throwing in the towel. Hard water’s a known repeat offender here.
Symptoms That Mean You’re Not Just “Overthinking It”
The One-Note Drip
Nope, that drip isn’t just annoying—it’s measurable. One drip per second equals roughly 3,000 gallons of water wasted per year. You wouldn’t pay for 3,000 gallons of milk you’re not using, right? So why tolerate a drippy faucet?
Stiff Handles or Squeaky Turns
If your faucet handle feels like it’s auditioning for a horror movie every time you turn it, something inside is either drying out or corroding. It's whispering, "replace me," every time it creaks.
Water Stains or Rust Trails
If you see brown streaks around the spout or under the sink, you’re not being dramatic—it’s rust. Which means the leak's been at it longer than you’ve admitted.
Rising Bills, No Visible Problems
Sometimes, the real horror is in the water bill. If you haven’t been taking 40-minute showers but your charges say otherwise, your faucet may be leaking in a way that doesn’t even leave visible evidence—yet.
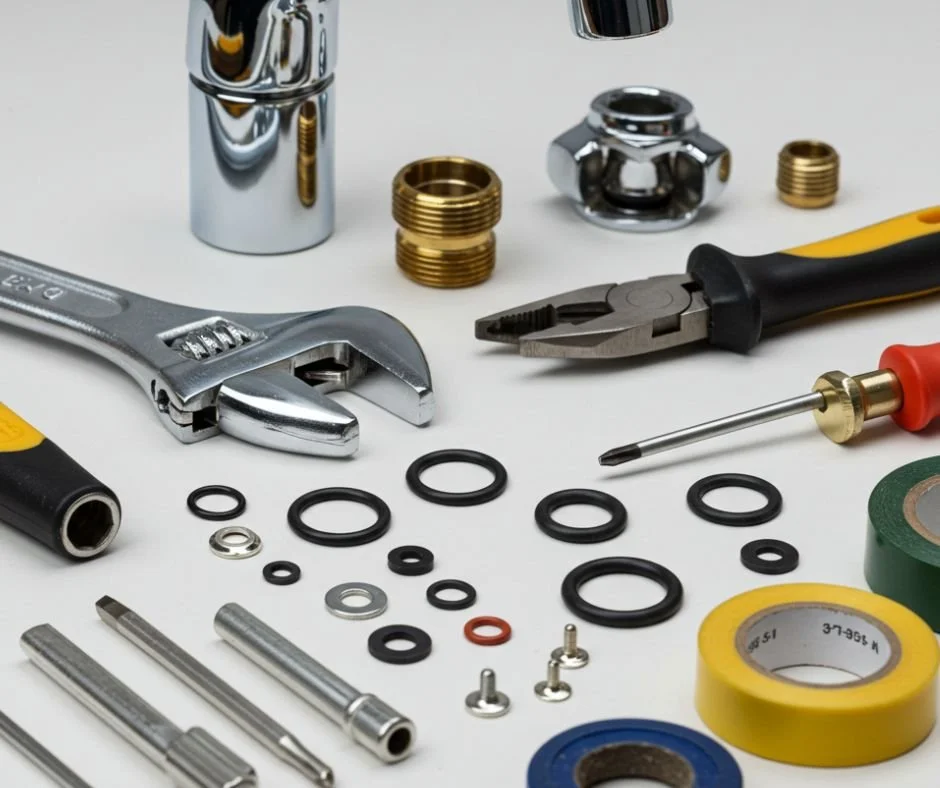
Essential Tools and Materials for Faucet Repair
We’re gonna say this plainly: if you’re still using pliers from 1998 to “tighten the thingy,” you're not doing faucet repair—you’re gambling.
Whether it’s a slow leak or a full-blown dripping faucet repair, having the right tools is the difference between feeling like a boss and making four emergency trips to the store in one afternoon.
Core Faucet Repair Tools That Actually Matter
Adjustable Wrench:
Loosens and tightens nuts without stripping them—assuming you don’t Hulk-smash it out of frustration.
Basin Wrench:
Specifically designed for those hard-to-reach nuts behind the sink. You’ll only hate plumbing once without this thing. Twice if you skip it.
Phillips and Flat-Head Screwdrivers:
Standard. Boring. Absolutely necessary. They get into handle assemblies and loosen cartridges, washers, and everything in between.
Hex (Allen) Wrenches:
A lot of modern faucets hide their screws behind tiny hex holes. If you’ve ever said, “Where the hell is the screw?”—you probably needed one of these.
Slip-Joint Pliers:
Great for holding and gripping small, stubborn parts without crushing them. Think of it as finesse, not force.
Replacement Parts: The Usual Suspects
Washers:
The main reason you’re even reading this. These bad boys absorb the pressure when you shut off your faucet. When they wear down? You get the dreaded drip.
O-Rings:
Seals the space between different moving parts, especially in the handle area. They're tiny, but when they go rogue, they flood their feelings everywhere.
Cartridges:
These regulate the water’s on/off and hot/cold mix in one sleek little device. When they wear out, your faucet gets unpredictable—and not in a fun way.
Tip: If you’re not sure which part’s the issue, it’s usually cheaper to buy a faucet repair kit that includes the main suspects (washers, O-rings, etc.) than play guessing games trip after trip.
Extra Materials That Make You Look Like You Know What You’re Doing
Plumber’s Grease:
You’re not rebuilding a V8 engine, but a little lube helps components turn smoothly and prevents the kind of friction that wrecks O-rings.
Thread Seal Tape (Teflon Tape):
Wrap it around threaded pipe joints to block micro-leaks. No, it’s not overkill—it’s what stands between you and an “almost fixed” faucet.
A Small Flashlight & Towel:
You will drop something. It will roll into a shadow realm behind the pipe. You will thank yourself for the flashlight and dry hands.
Where to Get the Good Stuff (Without Getting Ripped Off)
Home Depot and Lowe’s are fine if you know exactly what you’re looking for. Just don’t expect deep faucet philosophy from the aisle clerk.
Amazon for faucet repair tools and part kits if you want wide variety and user reviews (read them).
Manufacturer websites like Moen, Delta, or Kohler if you want OEM replacements—not “eh, close enough” knockoffs.
Or your local hardware store, where Steve’s worked since ‘98 and probably knows which faucet you own just by the face you make.
Step-by-Step Guide to Fixing a Leaky Faucet
You want to know how to fix a dripping faucet, and not in a “read three paragraphs of vague buildup first” kind of way. So, here’s the truth: it’s not rocket science. But it is plumbing—and plumbing punishes sloppiness, guesswork, and ego.
If you’re serious about leaky faucet repair that actually works (and doesn’t make you hate your wrench, your faucet, and your life), this is where you start. Follow the steps. Don’t skip. Don’t improvise. You’re not Gordon Ramsay with a wrench.
Step 1: Shut Off the Water Supply
Yes, this seems obvious. No, people don’t always do it.
Find the shutoff valves under your sink. Twist them clockwise until they stop. If they’re stuck, use a wrench (gently) or shut off the water at the main supply.
Open the faucet to drain leftover water and relieve pressure. If you skip this and get a faceful of surprise splash, that’s on you.
Tip: Use a towel to plug the drain. Small screws love to vanish like unpaid bar tabs.
Step 2: Disassemble Like You Mean It
No, you don’t need to “yank” anything. You need patience, control, and the right tools.
Use a hex key or screwdriver to remove the handle screw (it’s usually under a decorative cap).
Gently pull the handle off. If it’s stuck, wiggle it—not like a caveman, like someone trying not to crack a $200 fixture.
Loosen the packing nut with an adjustable wrench, then carefully extract the stem or cartridge, depending on what your faucet’s packing.
This is where most people give up. Don’t. If it’s tight, it’s because it hasn’t been touched in years—not because you’re doing it wrong.
Step 3: Inspect. Don’t Assume.
Here’s the golden rule: Don’t replace what’s not broken. Identify what’s worn, cracked, corroded, or just plain tired. Look for:
Washer damage: This is your most likely leak source. Look for cracks, flattening, or hardened rubber. If it looks sad, swap it.
O-ring degradation: Especially if the faucet leaks near the handle. Check for cuts, drying, or stretching.
Valve seat damage: If it looks rough, corroded, or pitted, you’ll need to resurface it or replace it entirely..
Step 4: Faucet Washer Replacement + Reassembly
Got your replacement parts? Good. If not, pause here. Matching washers and cartridges isn’t guesswork—it's precise. Bring the old one to the hardware store if you’re unsure.
Swap the washer with a new one of the same size and shape. Don’t improvise. Close enough isn’t close enough.
Reinstall the stem or cartridge, tighten the packing nut, and slide the handle back on.
Reattach the handle screw and pop the decorative cap back into place.
Tip: Add a touch of plumber’s grease to threads and rubber components. It extends their life and helps prevent future leaks.
Step 5: Testing the Repair
Turn the shutoff valves back on.
Slowly run both hot and cold water.
Watch closely. Is it still leaking? Is there dripping around the handle? Does anything feel off?
If it’s dry and silent, you’ve nailed it. If it’s still weeping like it watched a rom-com, you’ve got more digging to do.
Maintenance Tips and Troubleshooting
You know how people fix something once and then pretend it’ll never break again?
Yeah—that’s how you end up Googling ‘fixing a drippy faucet’ at 1:17 AM six months from now.
This is the part people skip. Don’t be people.
Keep It Dry and Drama-Free (Regular Maintenance Tips)
Inspect your faucet monthly. Not for sport—just a quick check around the base and handle for moisture.
Clean your aerator every few months. Mineral buildup from hard water (which 85% of U.S. households have) source can clog things fast.
If your water feels gritty, you may need filtration—or you’re staring down a potential water heater repair situation. Don’t wait until it smells weird too.
Troubleshooting When Things Still Don’t Work
You followed every step. You did everything right. And it still drips.
This doesn’t mean you're cursed. It means one of these:
You overtightened the washer. Believe it or not, too tight can cause leaks too.
The replacement part was wrong. Happens all the time. Even off by a millimeter, you’ll get a bad seal.
The valve seat’s eroded. If this isn’t resurfaced or replaced, no washer in the world will help.
There’s upstream pressure or sediment buildup. (Often a water heater issue, especially if it only drips when using hot water.)
At this point, be honest: Is this above your patience level?
If yes, it’s time to call a reputable plumbing company.
DIY vs. When to Tag in the Pros
You should do it yourself if:
You know the faucet type
The leak is isolated to one spout or handle
You have time and patience
You’ve successfully fixed it before
You should call in backup if:
You’ve replaced the washer twice and it still leaks
The shutoff valves are stuck
There’s corrosion or rust you can’t reach
You’ve said “screw this” more than three times
Remember: time is money. A faucet leak can waste 10 gallons a day. That’s 3,650 gallons a year. At national average rates, that’s about $60–$100 down the drain—literally.
Hiring a plumber once can cost less than your 8-month water waste total.
Conclusion
You came here looking for how to fix a dripping faucet, and now you’ve got everything: tools, steps, tips, and some hard truths.
Now you know:
What causes the leak
What to replace and why
How faucet washer replacement actually works
When it's time to stop DIY-ing and call a pro
How a silent faucet is one of the best mental health upgrades you’ll make this year
Don’t ignore that drip. Don’t pretend it’s not costing you. And don’t waste weekends on half-fixes when you can either do it right—or call someone who will.
Speaking of which: if your faucet’s still giving attitude, or your hot water's cutting out like a temperamental ex, Spotless Plumbers is standing by. No mess. No eye-rolls. No half-done jobs.
You want it fixed once—and right? That’s what we do.
Frequently Asked Questions:
-
A: Because the washer isn’t always the problem. If the valve seat is corroded, or you’ve installed a washer that’s not the exact fit, the seal won’t hold. You could also be dealing with a damaged O-ring or an over-tightened part that’s stressing the components. If the drip persists, recheck all seals, inspect the valve seat, and confirm you’ve used compatible replacement parts—not just "close enough" ones.
-
A: If your faucet is under 10 years old, parts are still available, and the leak is localized (washer, cartridge, O-ring), a repair is usually quicker and cheaper. But if you’re dealing with corrosion, cracks, or frequent leaks, or the finish is worn out, replacement often makes more sense. A decent faucet costs less than your next water bill if you ignore the leak.
-
A: Yes—if the leak is on the hot water side, your water heater works harder to keep water hot, even when it’s not being used. This wastes energy and shortens the heater’s lifespan. If your leak only happens when hot water’s involved, fix it fast—or you’re sending money (and heat) straight down the drain.
READ MORE…
How Does Plumbing Work? What Your Plumber Knows That You Don't
Top 10 Reasons for Low Water Pressure in Your Home
The Ultimate Guide to Fixing a Leaky Sink Drain Pipe